Spatchcock Turkey with Gluten-Free Gravy in HexClad
|
This herb-butter spatchcock turkey with gluten-free vegetable gravy and dry brine is my favorite practical, no-nonsense way to roast a turkey—everything cooks evenly and in half the time of a traditional whole bird. The spatchcock method also makes carving easier when you’re on that final countdown before guests arrive. I slice the turkey ahead and…

This herb-butter spatchcock turkey with gluten-free vegetable gravy and dry brine is my favorite practical, no-nonsense way to roast a turkey—everything cooks evenly and in half the time of a traditional whole bird. The spatchcock method also makes carving easier when you’re on that final countdown before guests arrive. I slice the turkey ahead and arrange it beautifully on a platter, so there’s no wrestling with a hot bird at the table. The meat stays juicy, the skin crisps up perfectly, and every bite is infused with garlic, rosemary, thyme, and sage.
The gravy is just as easy. It starts with vegetables roasted right in the pan under the turkey, soaking up all the flavor as it cooks. After roasting, I lightly blend and strain them, then simmer with cornstarch and broth—no flour roux needed. It’s naturally gluten-free, smooth, and ready in just a few minutes. Simple, stress-free, and packed with deep, roasted flavor.
I use the HexClad roasting pan and rack because it’s sturdy, heats evenly, and makes cleanup easy—plus it holds everything securely so the turkey cooks perfectly every time. And the turkey doesn’t require any messy basting while roasting.

This post contains affiliate links, which means I may earn a small commission if you make a purchase through the links at no extra cost to you. As always, I only recommend products I use and love!
Why You’ll Love This Spatchcock Turkey Recipe
- Juicy all-over meat: The bird cooks flat so light and dark meat finish at the same time.
- Crispy herb-butter skin: A flavorful butter mixture under and over the skin makes it golden brown.
- Quick roast time: Roasts in 60 to 90 minutes at high heat—much faster than traditional turkey.
- Rich gluten-free vegetable gravy: Made with roasted vegetables, drippings, and a cornstarch slurry.
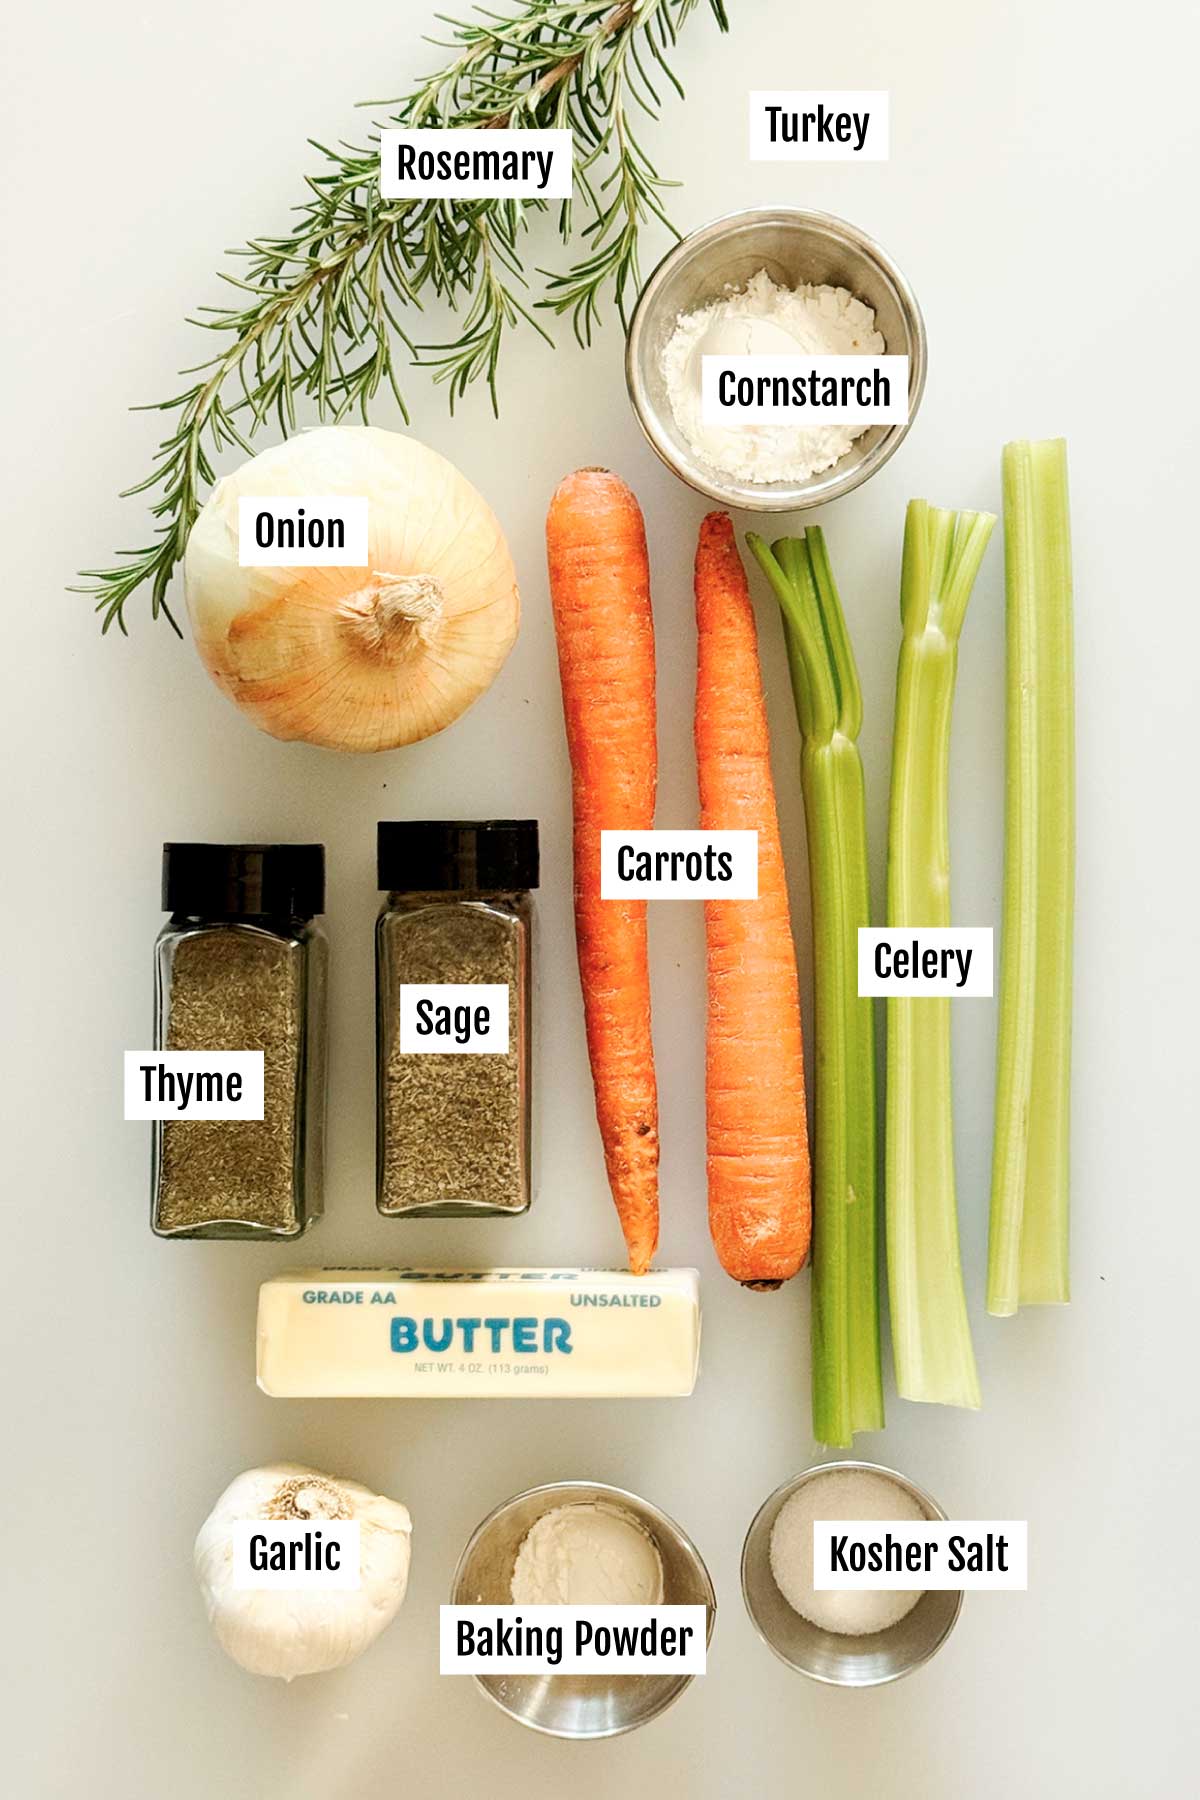
Ingredients & Substitutions
Here is everything you need to make this spatchcock turkey recipe:
- Turkey: A whole bird, spatchcocked by removing the backbone so it lays flat. I like to separate the legs for easier handling and even cooking. You can use a smaller bird or split the turkey if that works better for your setup.
- Kosher Salt: Perfect for dry brining because it spreads evenly and doesn’t over-salt. Sea salt flakes can work too if that’s what you have.
- Baking Powder: Helps the skin get extra crispy and golden. You can leave it out, but I find it gives the best texture.
- Butter: Softened butter adds richness and helps the herbs stick under the skin. Plant-based butter works great for a dairy-free option.
- Garlic: I use six cloves, minced, for bold flavor in the herb butter. Garlic paste or powder can work in a pinch.
- Thyme, Sage & Rosemary: These classic herbs give the turkey that comforting, savory depth. If you only have dried, just reduce the amount a bit.
- Carrots, Celery & Onion: These make a simple, flavorful bed under the turkey and help build the base of the gravy. You can toss in fennel or parsnips if you want a twist.
- Water: Keeps the vegetables from burning and turns into flavorful drippings for the gravy. Chicken stock is fine too if you prefer more flavor.
- Chicken Stock: Helps finish the gravy with just the right consistency. Vegetable stock works if you need a meat-free option.
- Cornstarch: Thickens the gravy without needing flour. Arrowroot or tapioca starch work well too for a gluten-free thickener.
Easily Adapt This Recipe for Any Diet
This recipe is naturally easy to tweak! Follow these simple swaps to make it gluten-free, dairy-free, or vegan while keeping the same great texture and flavor.
- Gluten-Free: Use certified gluten-free chicken stock and cornstarch.
- Dairy-Free: Use plant-based butter instead of regular butter.
- Vegan: Swap turkey with a plant-based roast and use veggie stock. The veggie-based gravy works just as well!
💡 Pro Tip: If you try a substitution, let us know how it worked in the comments!
How to Make My Spatchcock Turkey with Gluten-Free Vegetable Gravy
Here are easy, detailed, step-by-step instructions that are also repeated in the recipe card at the bottom of this blog post.
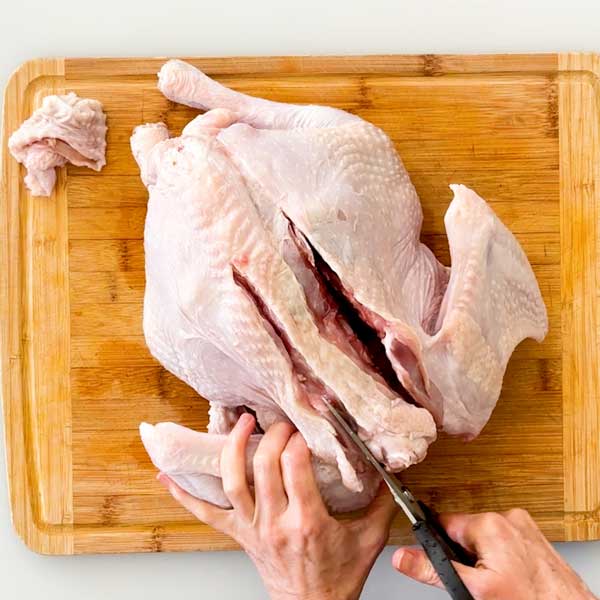
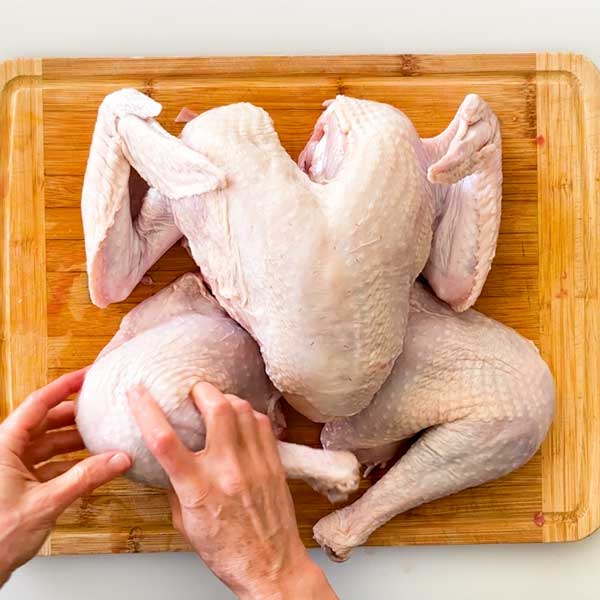
Step 1: Spatchcock the Turkey
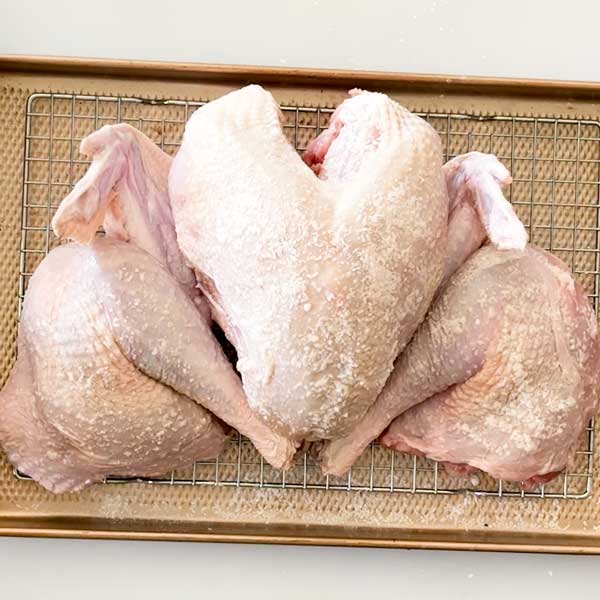
Drain your turkey and remove extra parts. Place it on a cutting board, trim the loose neck skin, and flip so the backbone is facing up. Use sharp kitchen shears to cut along both sides of the backbone to remove it. Remove the legs if you want easier handling.
Step 2: Dry Brine the Turkey
Pat everything dry with paper towels. Mix 3 tablespoons kosher salt with 1 tablespoon baking powder. Sprinkle over the entire bird, including the underside. Place uncovered in the fridge overnight. This step helps with juicy meat and crispy skin. Do not rinse off the brine the next day.

Step 3: Make the Herb Butter
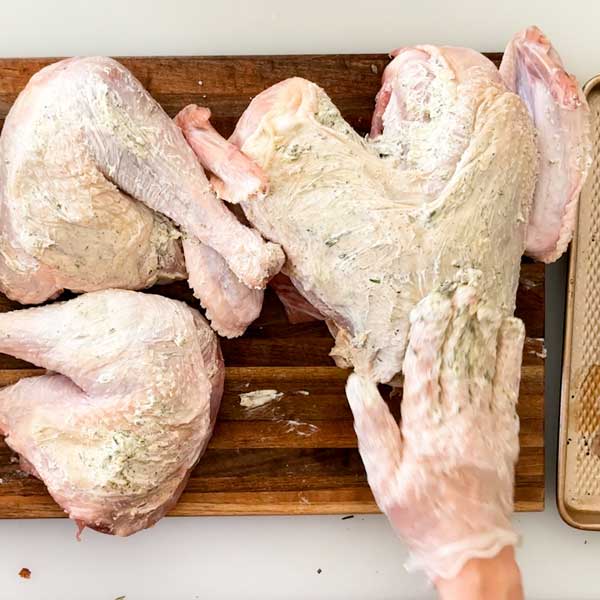
Mix 1/2 cup softened butter with 6 minced garlic cloves, 2 teaspoons thyme, 2 teaspoons sage, and 1 tablespoon rosemary. Score under the breastbone and press down on the breast until it cracks slightly—this helps it cook evenly. Loosen the skin and spread the herb butter under and over the skin.

Step 4: Prep the Roasting Pan
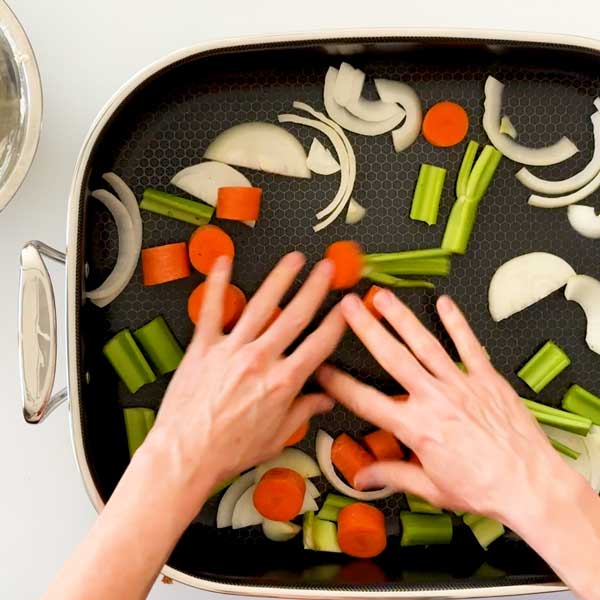
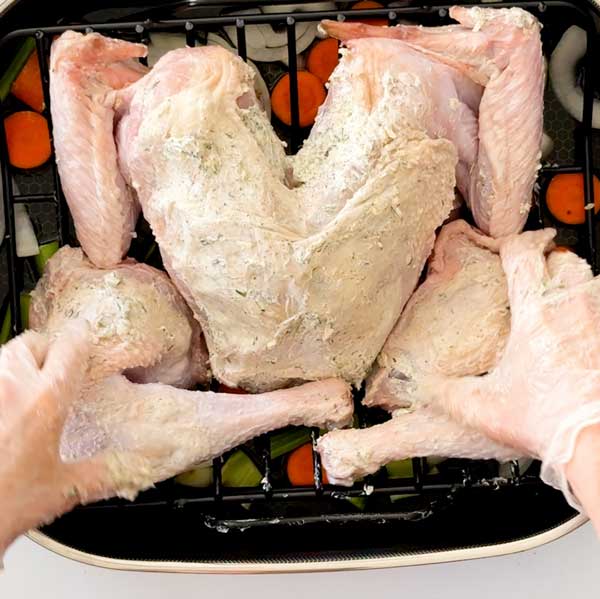
Rough chop 2 carrots, 3 celery stalks, and 1 onion. Add them to the bottom of a large roasting pan. Pour in 2 cups of water. Place a rack on top of the veggies and lay the turkey pieces skin-side up.
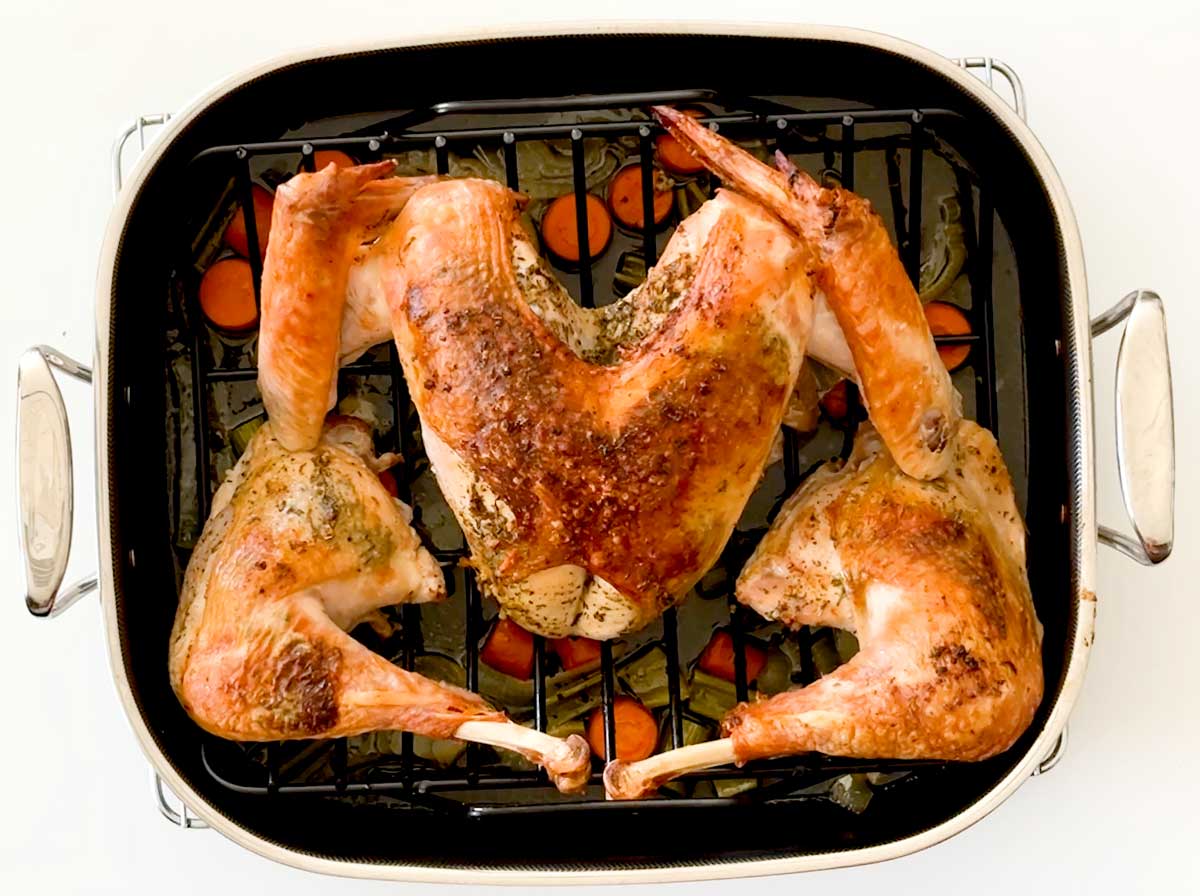
Step 5: Roast the Turkey
Roast at 425°F for 60 to 90 minutes. The breast should reach 150°F and the legs 175°F. Turn the pan halfway through and cover with foil if browning too fast. Remove parts as they finish cooking and let them rest.
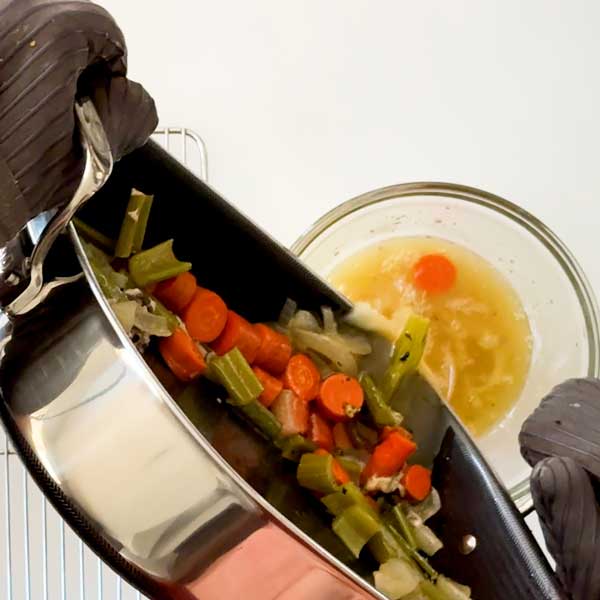
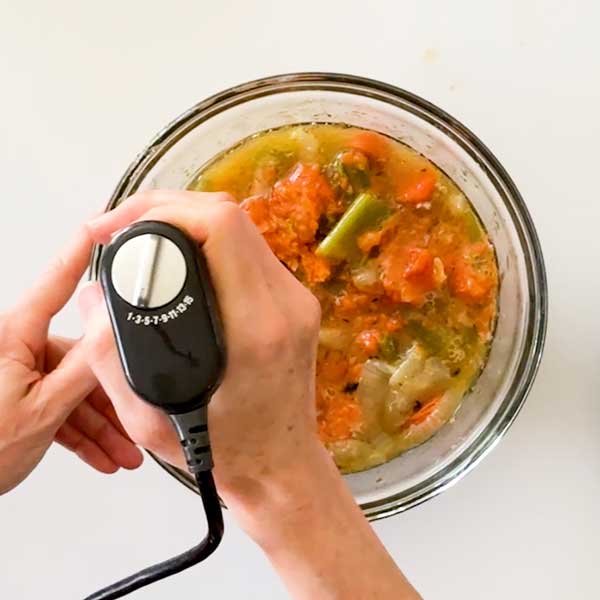
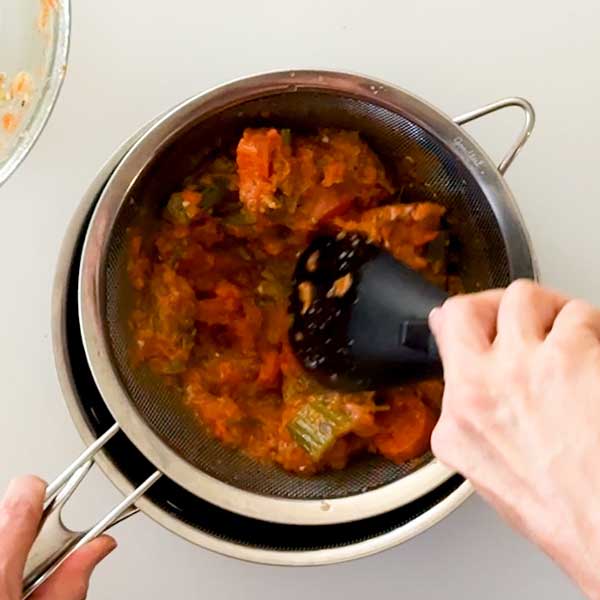
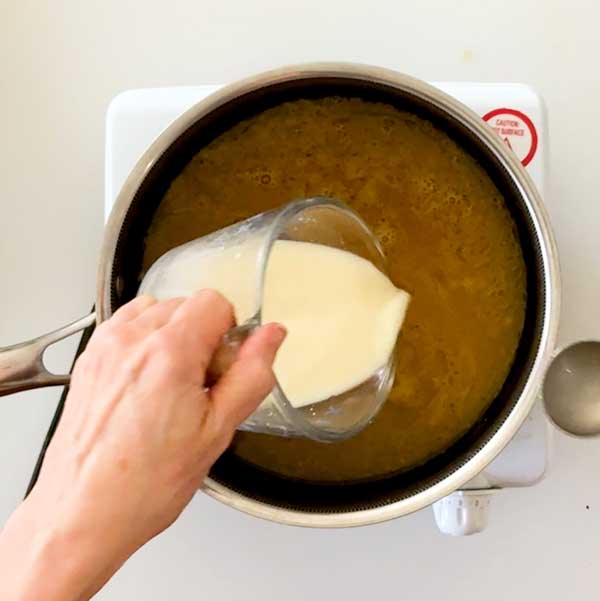
Step 6: Make the Gravy
Transfer the vegetables and drippings to a bowl and skim off the fat. Lightly blend the veggies with an immersion blender and strain into a saucepan. Bring to a simmer, then stir in 1 cup chicken stock mixed with 2 tablespoons cornstarch. Simmer 2–3 minutes until thickened.
My Expert Recipe Tips
- Don’t skip patting dry: This is key to crispy skin.
- Score the breastbone: Makes the bird lie flat and cook evenly.
- Rack over veggies = flavor: Adds richness to your gravy base.
- Lightly blend the gravy: Just a few pulses makes a silky texture.
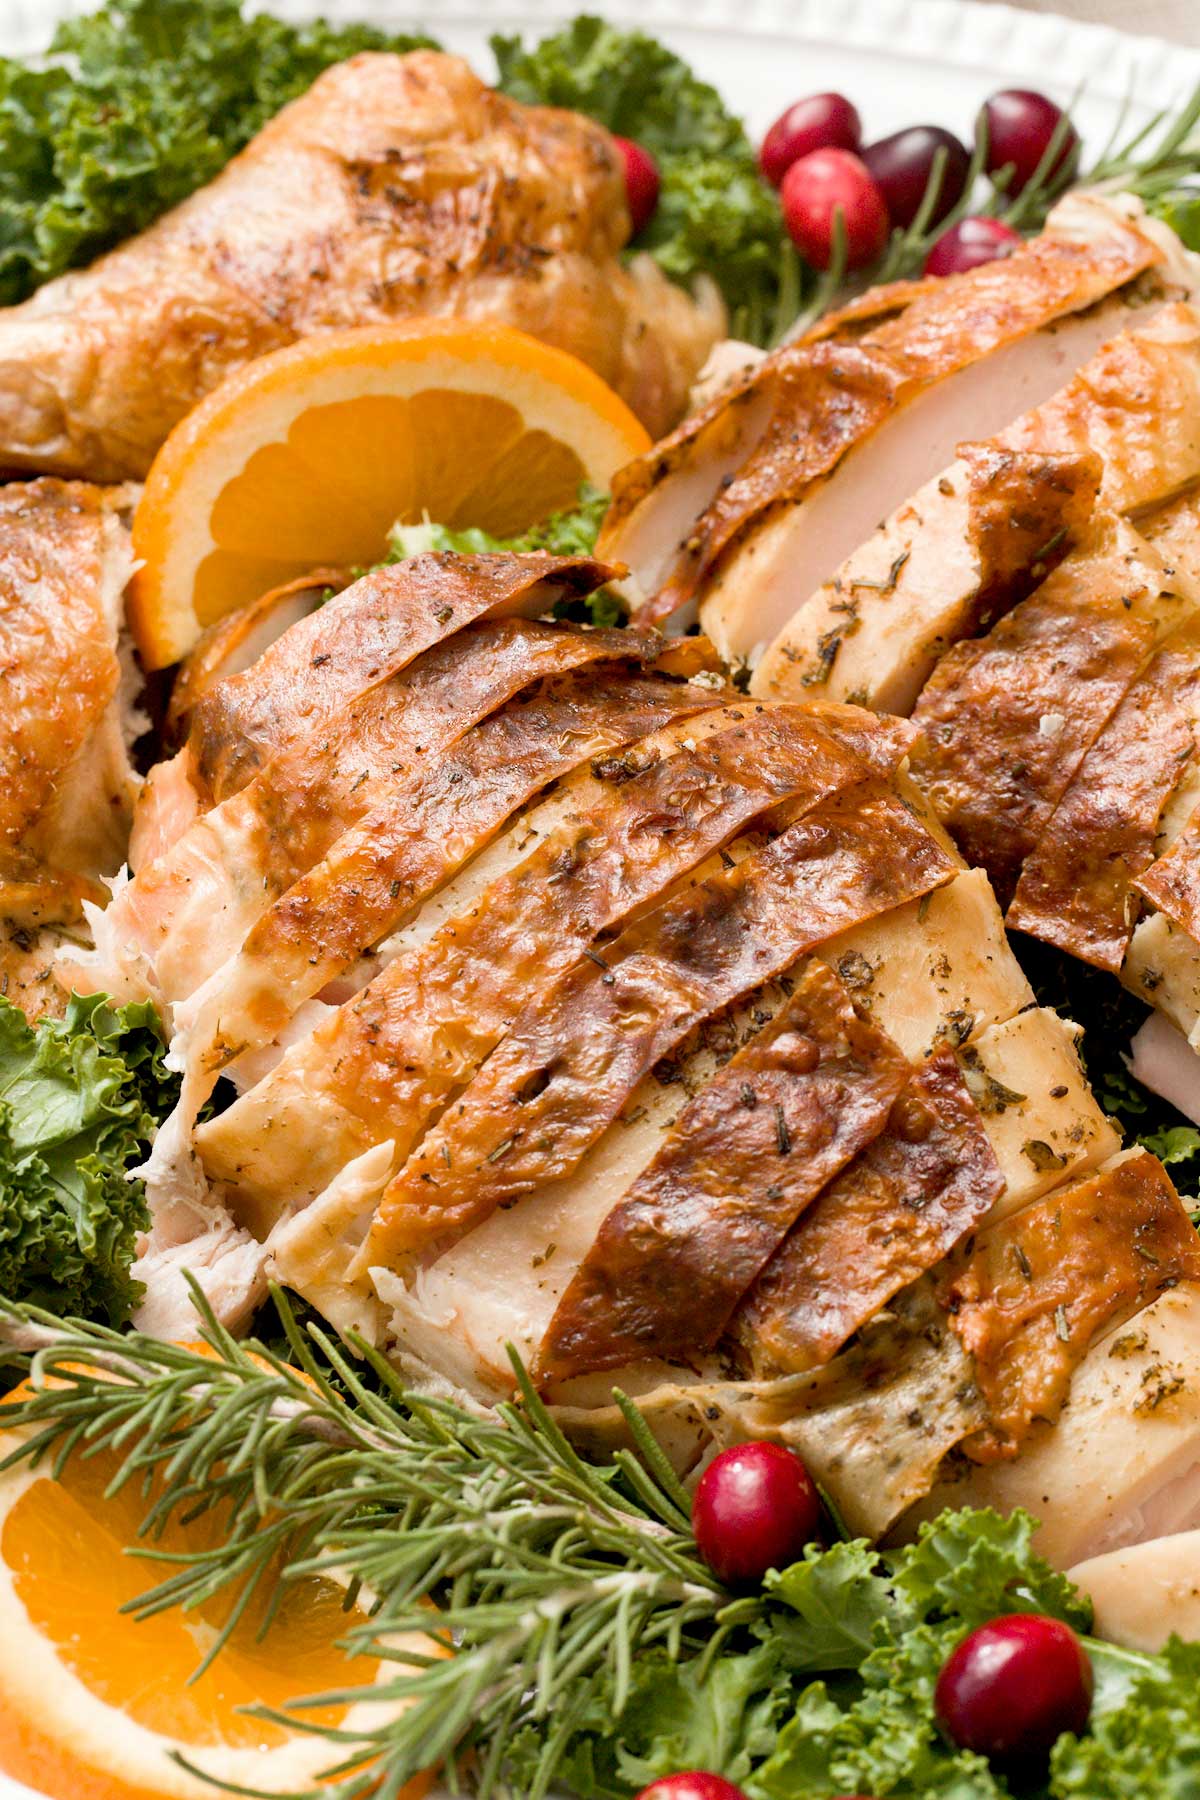
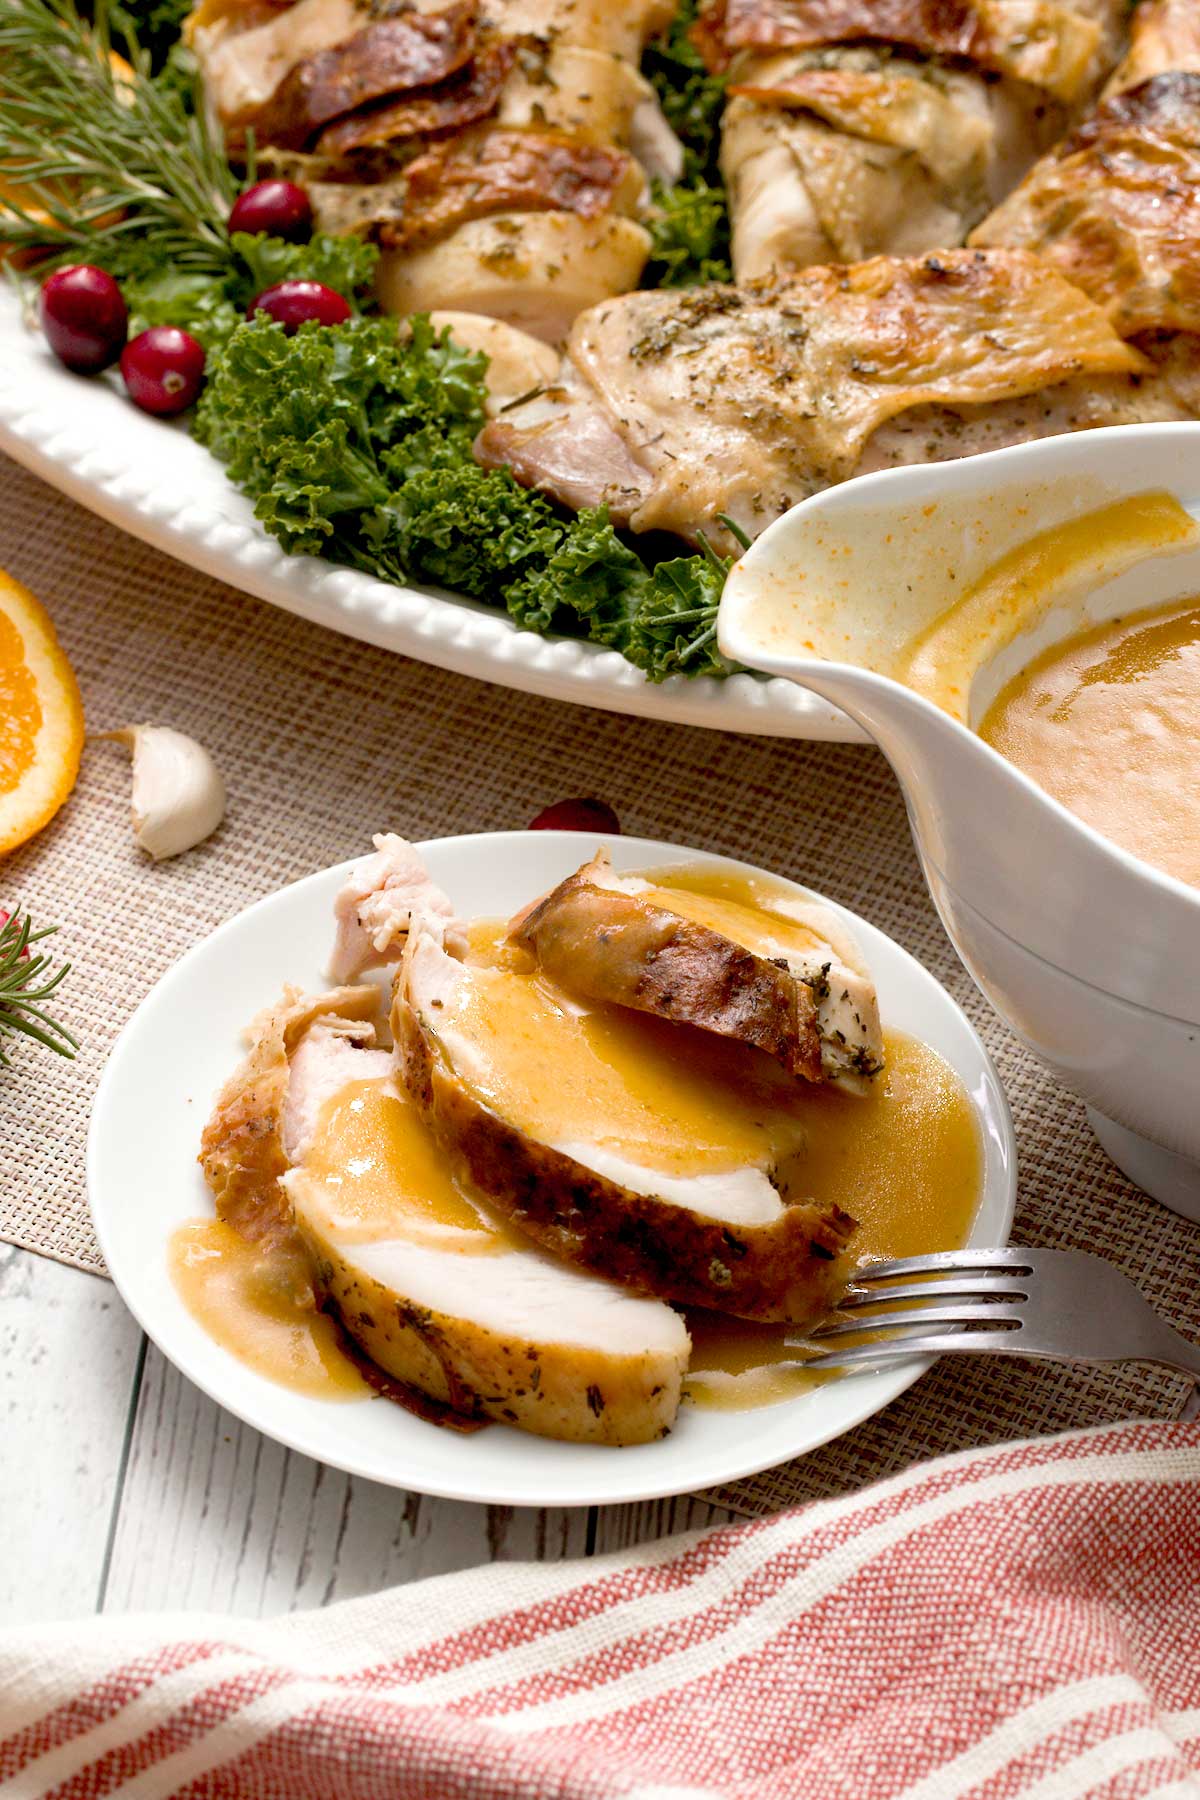
Delicious Serving Suggestions
- Arrange on a platter: Add kale leaves, orange slices, and fresh herbs.
- Use leftovers creatively: Make sandwiches or add to grain bowls.
- Gravy on everything: Keep a warm pitcher on the table so guests can pour their own.
Frequently Asked Questions
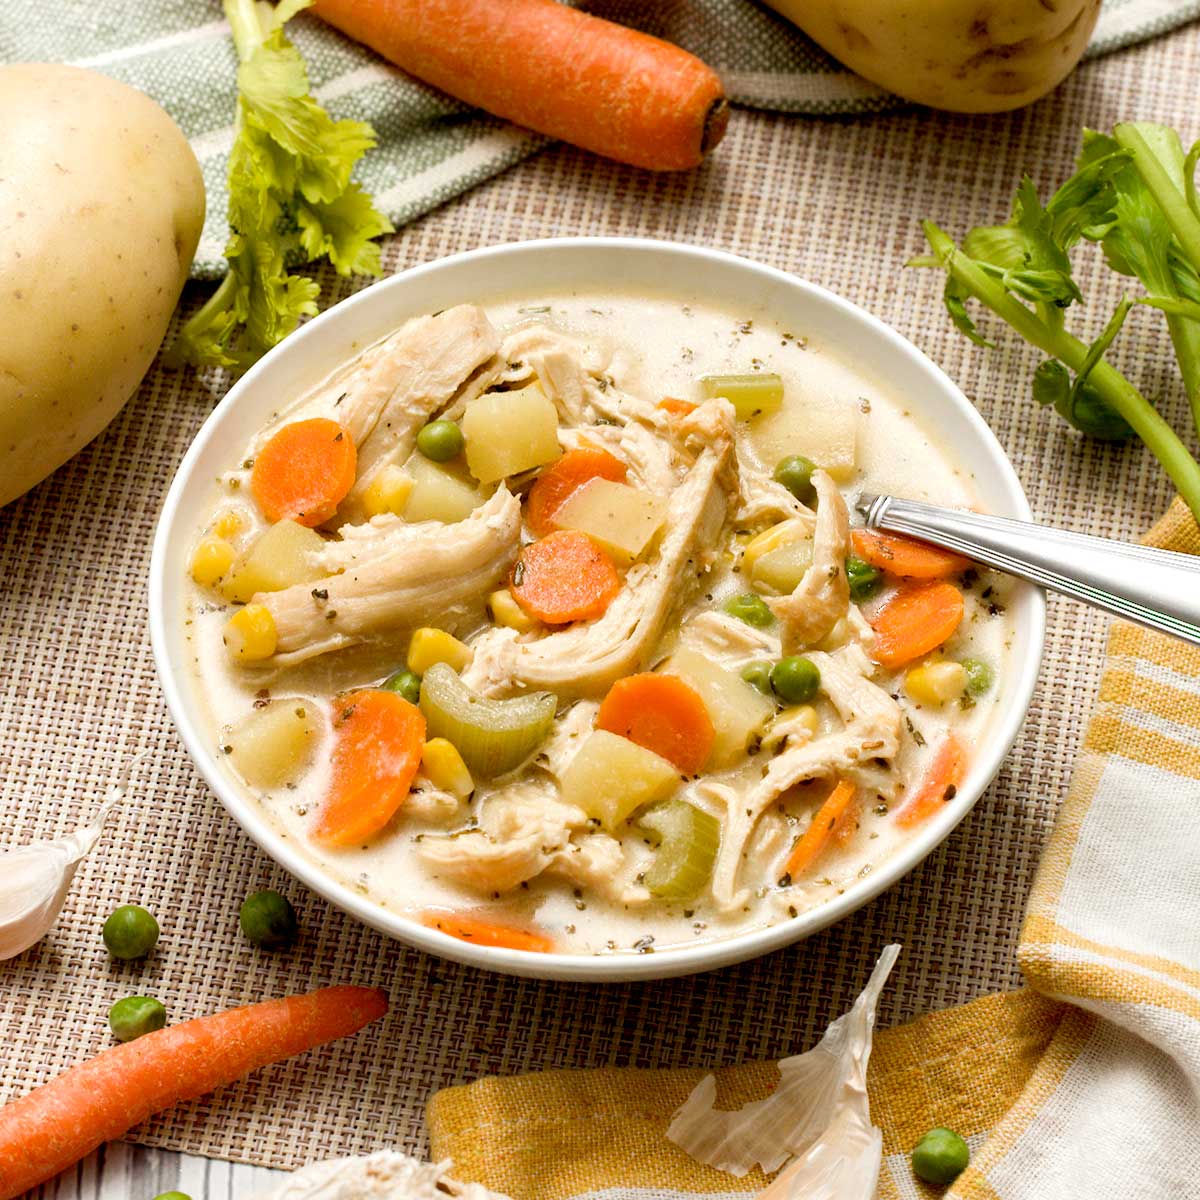
Here are a few of my favorite side dishes to serve with this turkey:


Spatchcock Turkey with Gluten-Free Gravy in HexClad
Gluten-FreeIngredients
- 1 whole turkey (thawed)
- 3 tablespoons kosher salt
- 1 tablespoon baking powder
- 1/2 cup butter
- 1 tablespoon rosemary
- 2 teaspoons thyme
- 2 teaspoons sage
- 2 carrots
- 3 celery stalks
- 1 yellow onion
- 2 cups water
- 1 cup chicken stock
- 2 tablespoons cornstarch
Instructions
- Drain your turkey and remove extra parts. Place it on a cutting board, trim the loose neck skin, and flip so the backbone is facing up. Use sharp kitchen shears to cut along both sides of the backbone to remove it. Remove the legs if you want easier handling.
- Pat everything dry with paper towels. Mix 3 tablespoons kosher salt with 1 tablespoon baking powder. Sprinkle over the entire bird, including the underside. Place uncovered in the fridge overnight. This step helps with juicy meat and crispy skin.
- Mix 1/2 cup softened butter with 6 minced garlic cloves, 2 teaspoons thyme, 2 teaspoons sage, and 1 tablespoon rosemary. Score under the breastbone and press down on the breast until it cracks slightly—this helps it cook evenly. Loosen the skin and spread the herb butter under and over the skin.
- Rough chop 2 carrots, 3 celery stalks, and 1 onion. Add them to the bottom of a large roasting pan. Pour in 2 cups of water. Place a rack on top of the veggies and lay the turkey pieces skin-side up.
- Roast at 425°F for 60 to 90 minutes. The breast should reach 150°F and the legs 175°F. Turn the pan halfway through and cover with foil if browning too fast. Remove parts as they finish cooking and let them rest.
- Transfer the vegetables and drippings to a bowl and skim off the fat. Lightly blend the veggies with an immersion blender and strain into a saucepan. Bring to a simmer, then stir in 1 cup chicken stock mixed with 2 tablespoons cornstarch. Simmer 2–3 minutes until thickened.
Video
Notes
Nutrition
Important Disclaimer
This recipe is created by a home cook and not a medical professional. Our ingredient philosophy is reviewed by RDNs, but this specific post is not personalized medical advice. Please consult your healthcare provider for dietary concerns.

The herb butter took this turkey over the top! Taking the extra step to spatchcock the turkey and dry brine it the day before, the turkey meat was not dry at all so flavorful! Every enjoyed it even the non turkey lovers! I had to sneak some away for my sandwich the next day!! Go to recipe everytime I cook a turkey, thank you!!!
Hi Jennifer, I agree, the garlic herb butter is the secret sauce 🙂 Thank you for the review!
This the fool-proof method for juicy, crispy turkey that I can’t wait for you to try! Let me know in the comments how it turns out 🙂