Almond Joy Candy Bar Copycat (Gluten-Free)
|
These Almond Joy candy bar copycats are a homemade, no-bake version of the classic candy bar, made with coconut, almond flour, maple syrup, and dark chocolate. They’re naturally gluten-free and dairy-free, skip sweetened condensed milk, and set easily in the freezer for clean layers and easy dipping.

These Almond Joy candy bar copycats are a no-bake homemade version of the classic candy bar, made with coconut, almond flour, maple syrup, and dark chocolate. They’re naturally gluten-free and dairy-free, skip sweetened condensed milk, and set in the freezer for easy shaping and clean chocolate coating.
What sets this recipe apart is the use of almond flour in the coconut filling. Instead of an overly wet or crumbly center, the almond flour absorbs moisture and balances the coconut so the bars hold together once chilled and have a smoother, more satisfying bite.
I tested several coconut ratios before landing on this version, and these are the candy bars I keep stocked in my freezer. My teenagers choose them over store-bought Almond Joys every time, especially because the chocolate shell has that classic snap and the center stays perfectly chewy.
Why This Almond Joy Candy Bars Recipe Works
- Real candy bar texture: A chewy coconut center, crunchy almond, and crisp chocolate shell mimic the classic Almond Joy without artificial ingredients.
- Almond flour balance: Almond flour absorbs excess moisture so the filling holds together instead of feeling dry, crumbly, or overly wet.
- Freeze-before-dip method: Chilling the bars firms the coconut mixture, making them easy to dip and preventing melting or misshapen bars.
- Simple no-bake process: Six pantry ingredients and a quick chill replace baking, candy thermometers, or complicated techniques.
Ingredients & Substitutions
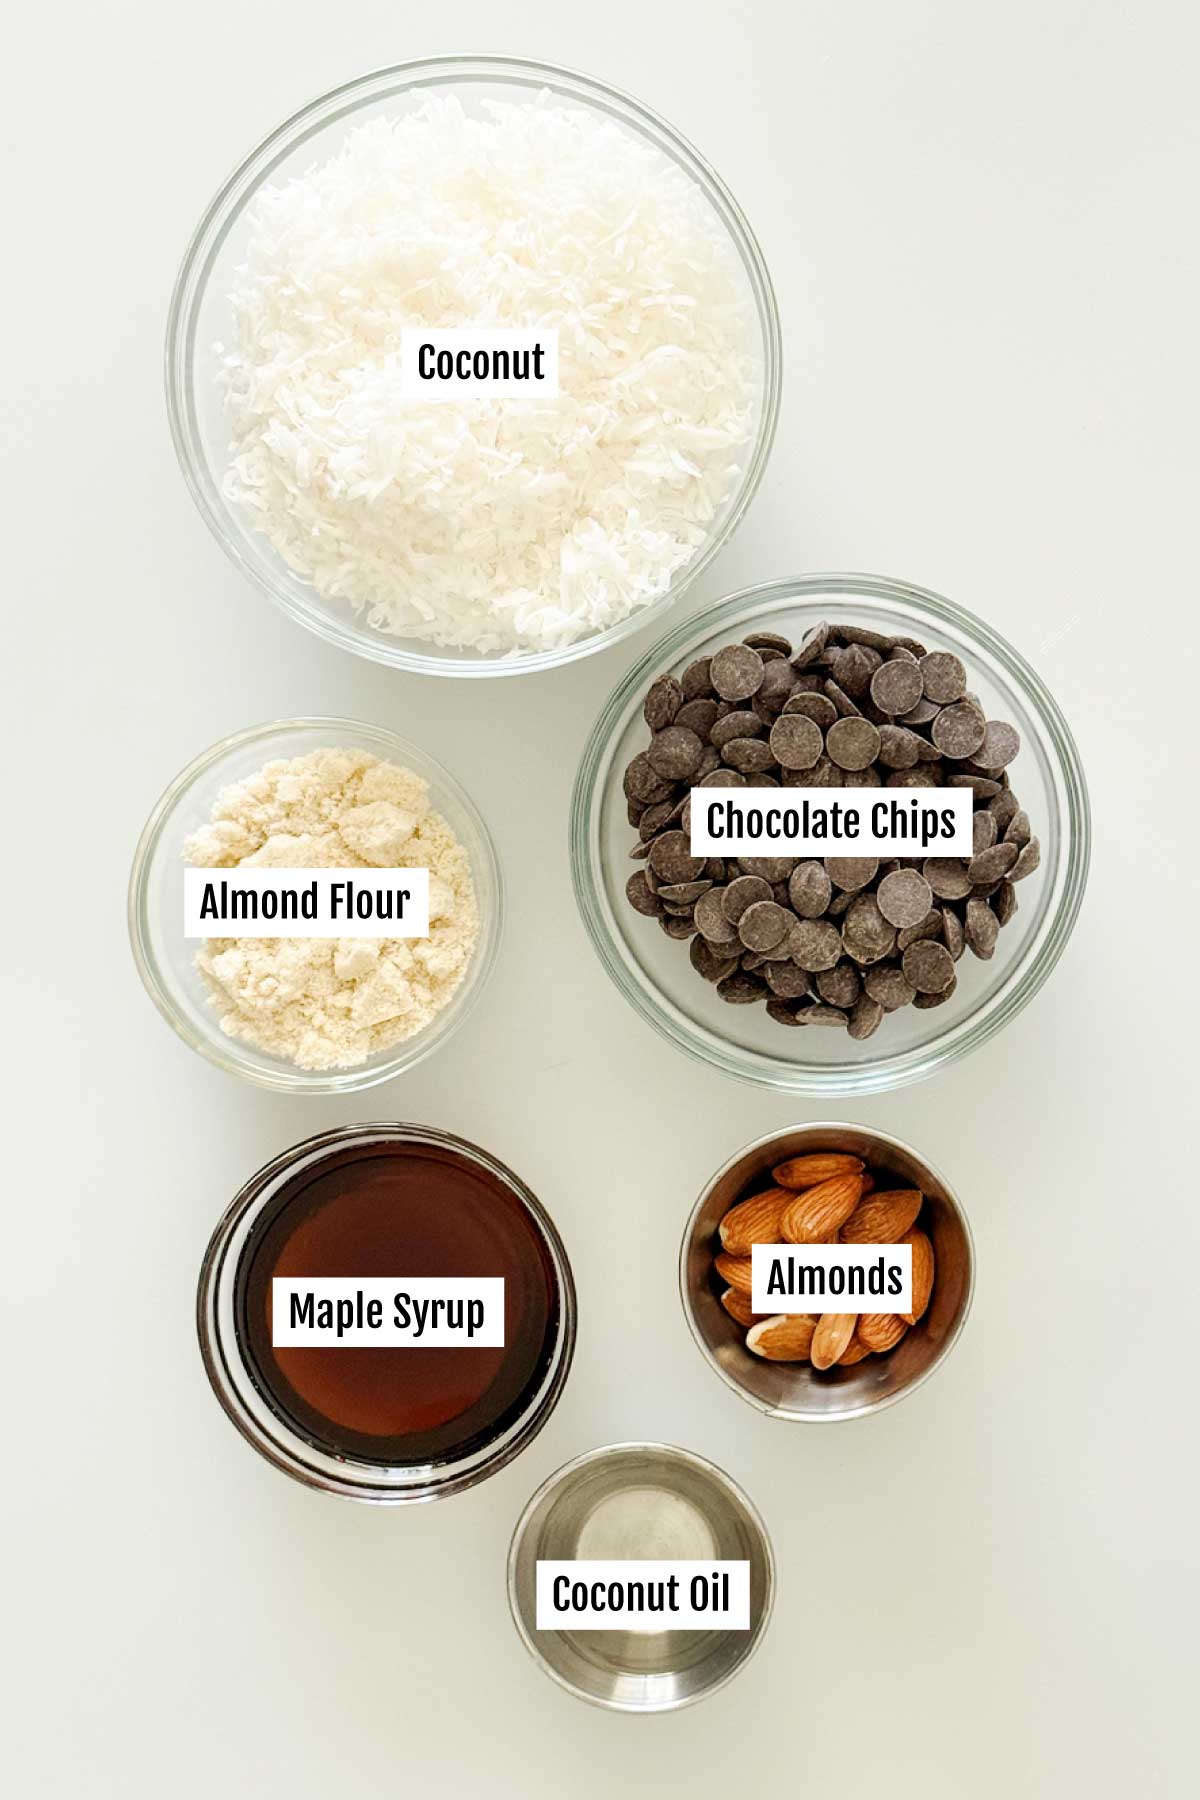
Here is everything you need to make almond joy candy bars:
- Unsweetened shredded coconut: This is the base of the bars and gives them their classic chew. Finely shredded, unsweetened coconut works best since larger flakes or sweetened coconut can throw off the texture.
- Almond flour: This is what keeps the filling smooth instead of crumbly. It absorbs moisture from the coconut and syrup so the bars hold together once chilled.
- Maple syrup: This sweetens and binds the mixture without sweetened condensed milk. Honey works as a 1:1 substitute, but the bars will be slightly stickier and sweeter.
- Coconut oil: This helps the bars firm up in the freezer so they are easy to dip and keep their shape. Refined coconut oil has a neutral flavor, while virgin coconut oil adds more coconut taste.
- Chocolate chips: Dark chocolate in the 60 to 70 percent cacao range gives the best balance. If the chocolate feels thick when melted, a teaspoon of coconut oil makes dipping easier.
- Whole almonds: One almond pressed into each bar gives that classic Almond Joy look and a clean crunch. Raw or roasted almonds both work well.
Easily Adapt This Recipe for Any Diet
This recipe is naturally easy to adjust without changing the texture or flavor.
- Gluten-Free: The bars are gluten-free as written. I always double-check that my chocolate chips are labeled gluten-free since some brands are processed on shared equipment.
- Dairy-Free: Use dairy-free chocolate chips to keep the bars completely dairy-free. I have had good results with Enjoy Life and other dairy-free dark chocolate brands.
- Vegan: When made with dairy-free chocolate chips, this recipe is fully vegan using all plant-based ingredients.
💡 Pro Tip: If you make a substitution that works well for you, leave a comment so others can learn from it too.
How to Make My Almond Joy Candy Bars Recipe
Here are easy, detailed, step-by-step instructions that are also repeated in the recipe card at the bottom of this blog post.
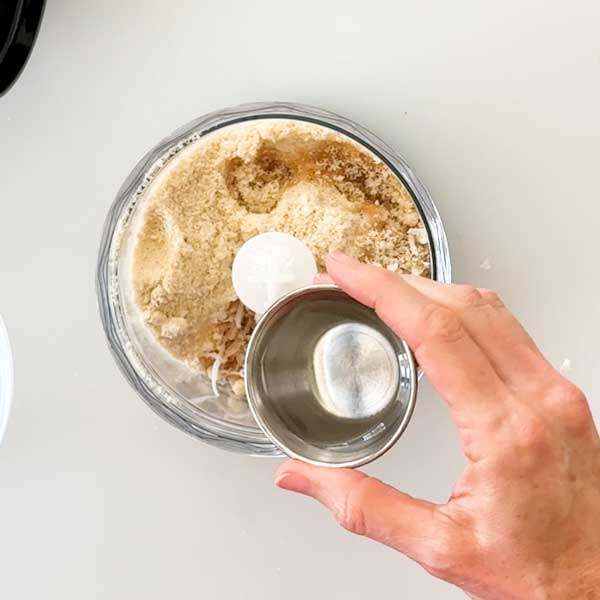
Step 1: Blend the Coconut Mixture
Add 2 cups unsweetened shredded coconut, 1/4 cup almond flour, 1/4 cup maple syrup, and 2 tablespoons coconut oil to a small food processor or chopper cup. Pulse until the mixture holds together when pressed. It should look like slightly damp sand that clumps easily. If it feels dry, add 1 teaspoon maple syrup or coconut oil and pulse again.
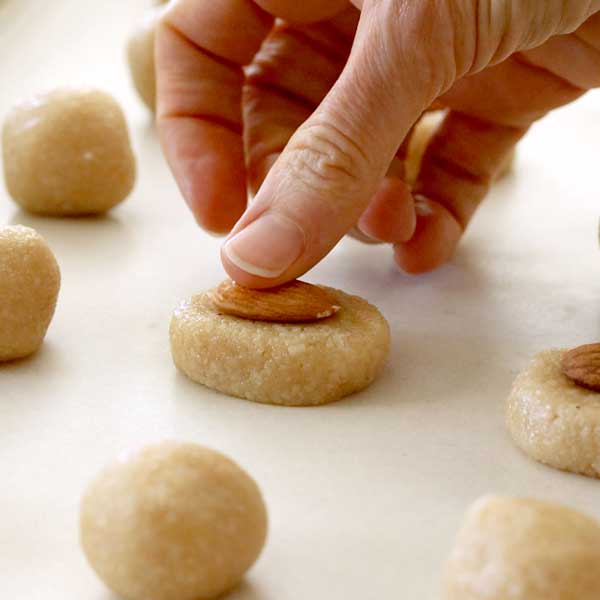
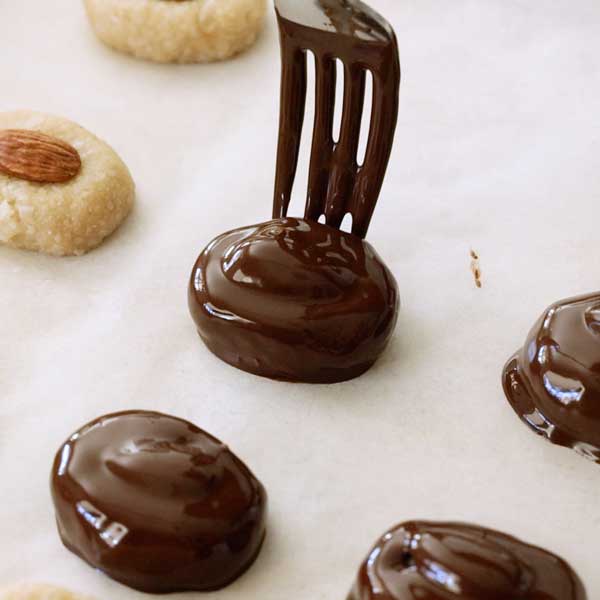
Step 2: Shape the Bars
Line a baking sheet with parchment paper. Scoop the mixture into small portions, roll into balls, then gently press into short rectangular bars. Press 1 whole almond into the top of each bar. Freeze for at least 20 minutes until firm. This step makes dipping much easier and keeps the bars from falling apart.
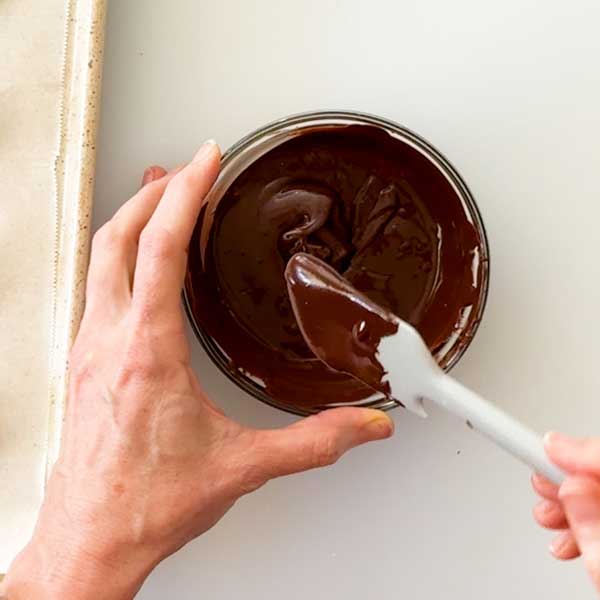
Step 3: Melt the Chocolate
Add 1/2 cup chocolate chips to a microwave-safe bowl. Microwave in 30-second intervals, stirring well each time, until smooth. If the chocolate feels thick, stir in 1 to 2 teaspoons coconut oil so it coats the bars easily.
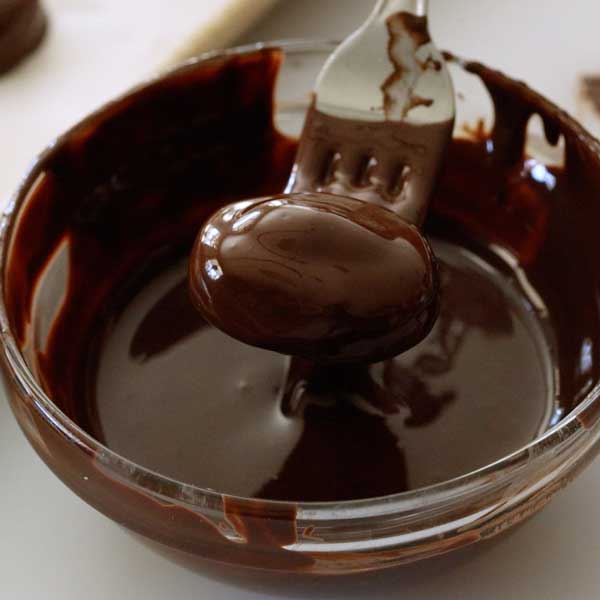
Step 4: Dip and Finish
Remove the bars from the freezer. Dip each bar into the melted chocolate, almond side first, then flip to coat completely. Lift with a fork, tap off excess chocolate, and return to the parchment-lined sheet. Sprinkle with flaky sea salt if using, then chill until the chocolate is set, about 15 minutes.
My Expert Recipe Tips
- Process until it clumps: The coconut mixture should hold together when pressed without feeling wet. If it stays crumbly, add maple syrup or coconut oil one teaspoon at a time until it binds.
- Freeze before dipping: Freezing the bars is essential. Firm bars are much easier to dip and keep their shape instead of softening in the chocolate.
- Thin the chocolate if needed: If the melted chocolate feels thick, stirring in a teaspoon of coconut oil makes dipping smoother and creates a thinner, more even coating.
- Use a fork for dipping: Drop the bar into the chocolate, flip with a fork, then lift and tap off excess chocolate on the side of the bowl for a clean finish.
- Work in batches: Keep the remaining bars in the freezer while you dip so they stay firm and easy to handle.
Delicious Serving Suggestions
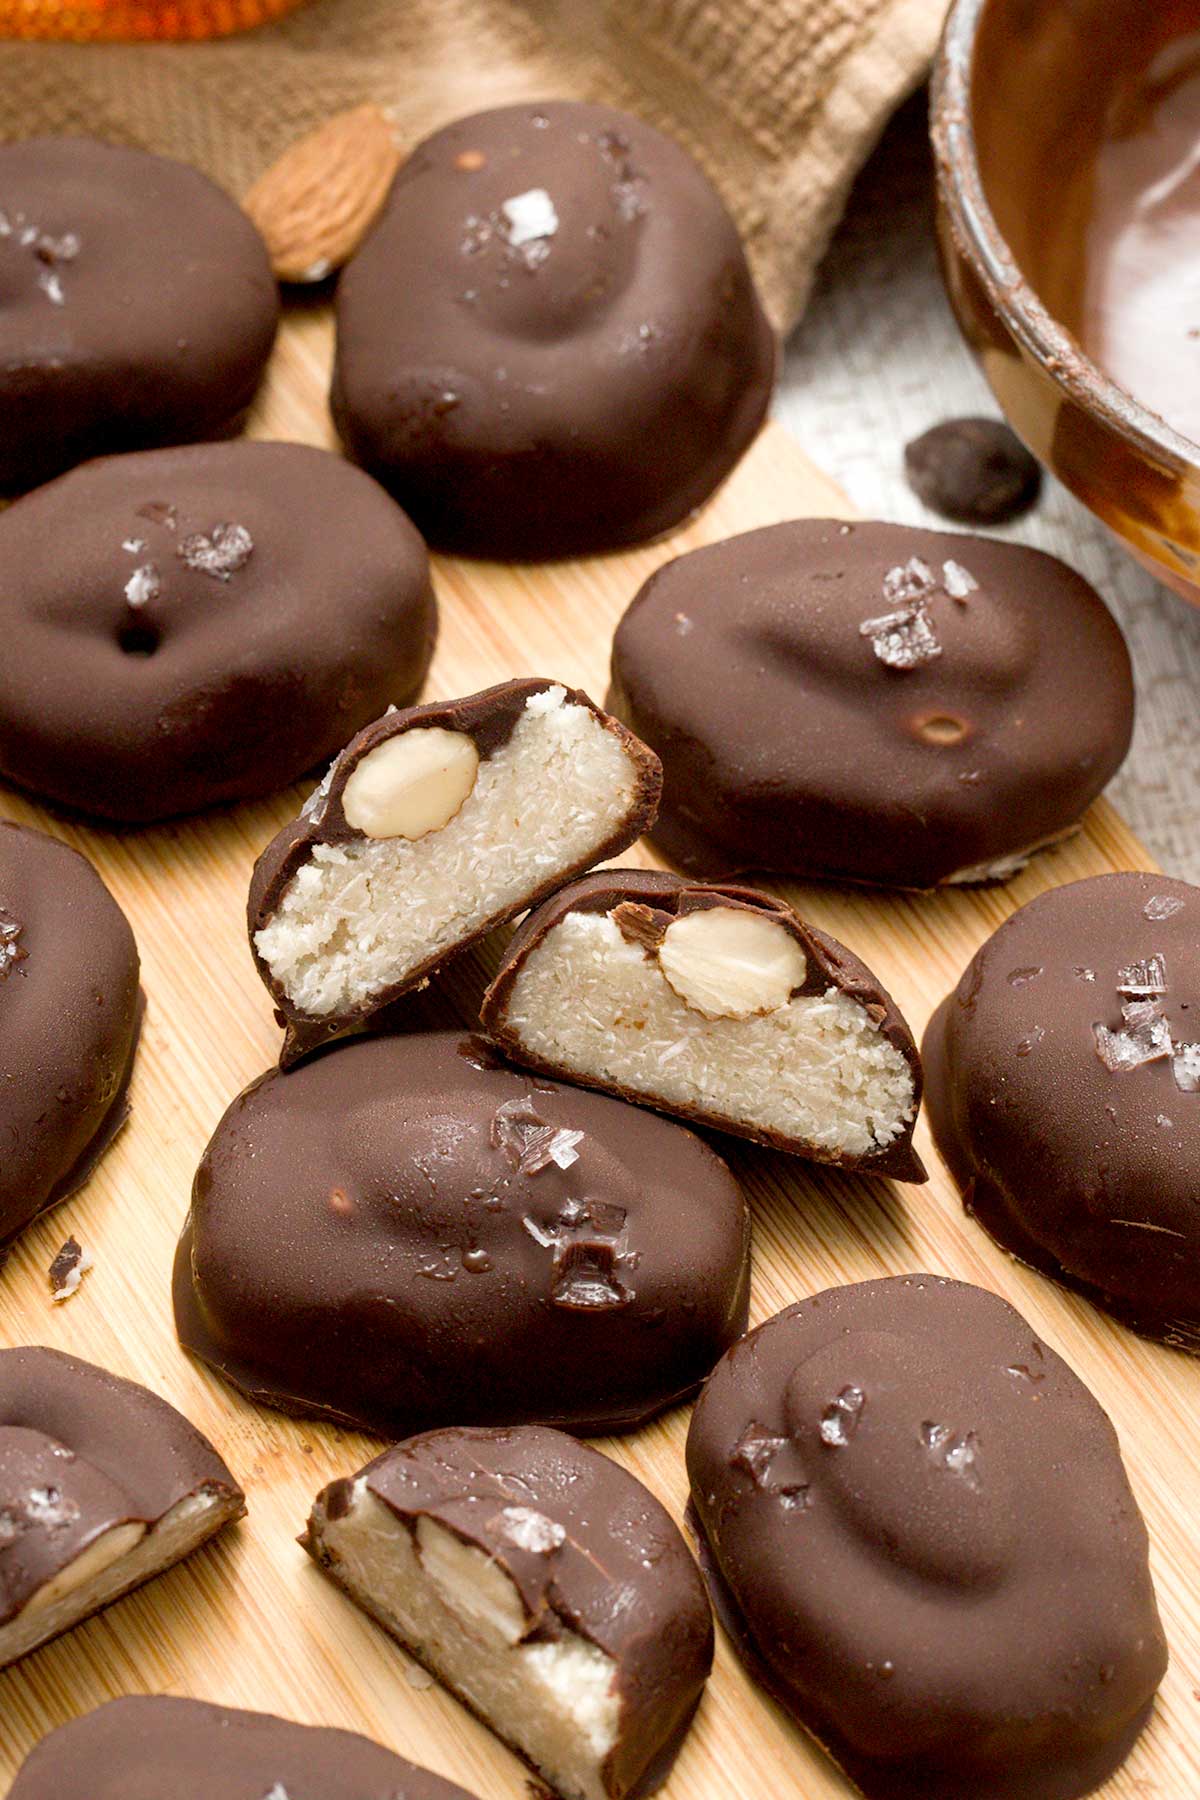
- After-dinner dessert: Keep these in the freezer and enjoy one straight from the freezer after dinner. The cold chocolate shell cracks as you bite into it, with a perfectly chewy coconut center.
- Afternoon pick-me-up: These are great when that mid-afternoon slump hits. One bar satisfies a sweet craving and feels more sustaining than store-bought candy.
- Party or gift idea: These look polished enough for sharing. I package them in small boxes for gifts, and people are always surprised they’re homemade.
Frequently Asked Questions
Do you love homemade candy bar copycat? Check out more of my gluten-free, naturally sweetened versions of classic candy bars:


Almond Joy Candy Bar Copycat (Gluten-Free)
Dairy-Free | Gluten-FreeIngredients
- 2 cups unsweetened coconut
- 1/4 cup almond flour
- 1/4 cup maple syrup
- 2 tablespoons coconut oil
- 1/2 cup chocolate chips
- 16 almonds
Instructions
- Add 2 cups unsweetened shredded coconut, 1/4 cup almond flour, 1/4 cup maple syrup, and 2 tablespoons coconut oil to a small food processor or chopper cup. Pulse until the mixture holds together when pressed. It should look like slightly damp sand that clumps easily. If it feels dry, add 1 teaspoon maple syrup or coconut oil and pulse again.
- Line a baking sheet with parchment paper. Scoop the mixture into small portions, roll into balls, then gently press into short rectangular bars. Press 1 whole almond into the top of each bar. Freeze for at least 20 minutes until firm. This step makes dipping much easier and keeps the bars from falling apart.
- Add 1/2 cup chocolate chips to a microwave-safe bowl. Microwave in 30-second intervals, stirring well each time, until smooth. If the chocolate feels thick, stir in 1 to 2 teaspoons coconut oil so it coats the bars easily.
- Remove the bars from the freezer. Dip each bar into the melted chocolate, almond side first, then flip to coat completely. Lift with a fork, tap off excess chocolate, and return to the parchment-lined sheet. Sprinkle with flaky sea salt if using, then chill until the chocolate is set, about 15 minutes.
Video
Notes
Nutrition
Important Disclaimer
This recipe is created by a home cook and not a medical professional. Our ingredient philosophy is reviewed by RDNs, but this specific post is not personalized medical advice. Please consult your healthcare provider for dietary concerns.
Looking for more desserts made without refined sugar?
Browse all of my naturally sweetened dessert recipes, made with maple syrup, honey, fruit, and other simple sweeteners for treats that feel familiar and satisfying.

I like the way unblended coconut flakes taste and feel. Would it still work the same if I skipped the blending and almond flour? I want to try both ways if it’s okay. I’m sure it will be. Just getting confirmation.
Sure, you can give it a try 🙂 As long as they are dry enough to hold together without the almond flour.
This is the BEST recipe ever!! And believe me, I’ve tried lots of recipes looking for a good, clean Almond Joy dupe for years! 🙂 I like to add three roasted almonds to each one (one is too few) and dip them in melted coconut-sugar-sweetened dark chocolate chips (Hu and Guittard both make a good one) for a refined-sugar-free recipe I can take to eat when everyone around me is eating treats that literally make me sick! These are so good and I never feel deprived. Thank you for sharing!
Emily! Thank you so much for sharing this with me!! I’m so glad you have a treat you can enjoy 🙂
This is delicious!! it tastes just like the real deal, but better. My husband loved them. This is what I am going to make for a Halloween treat for my family. Thank you for this recipe.
Linda! Thank you so much for sharing this with me!! I love that you’ll be making them as a Halloween treat 🙂
This is one of my husband’s favorite candy bars so I can’t wait to make a healthy version for him! Thank you!
Fantastic, Georgia! I hope he loves these 🙂
You’ll be surprised how easy these are to make! And you can customize them with any chocolate you like 🙂 Please let me know how they turn out.