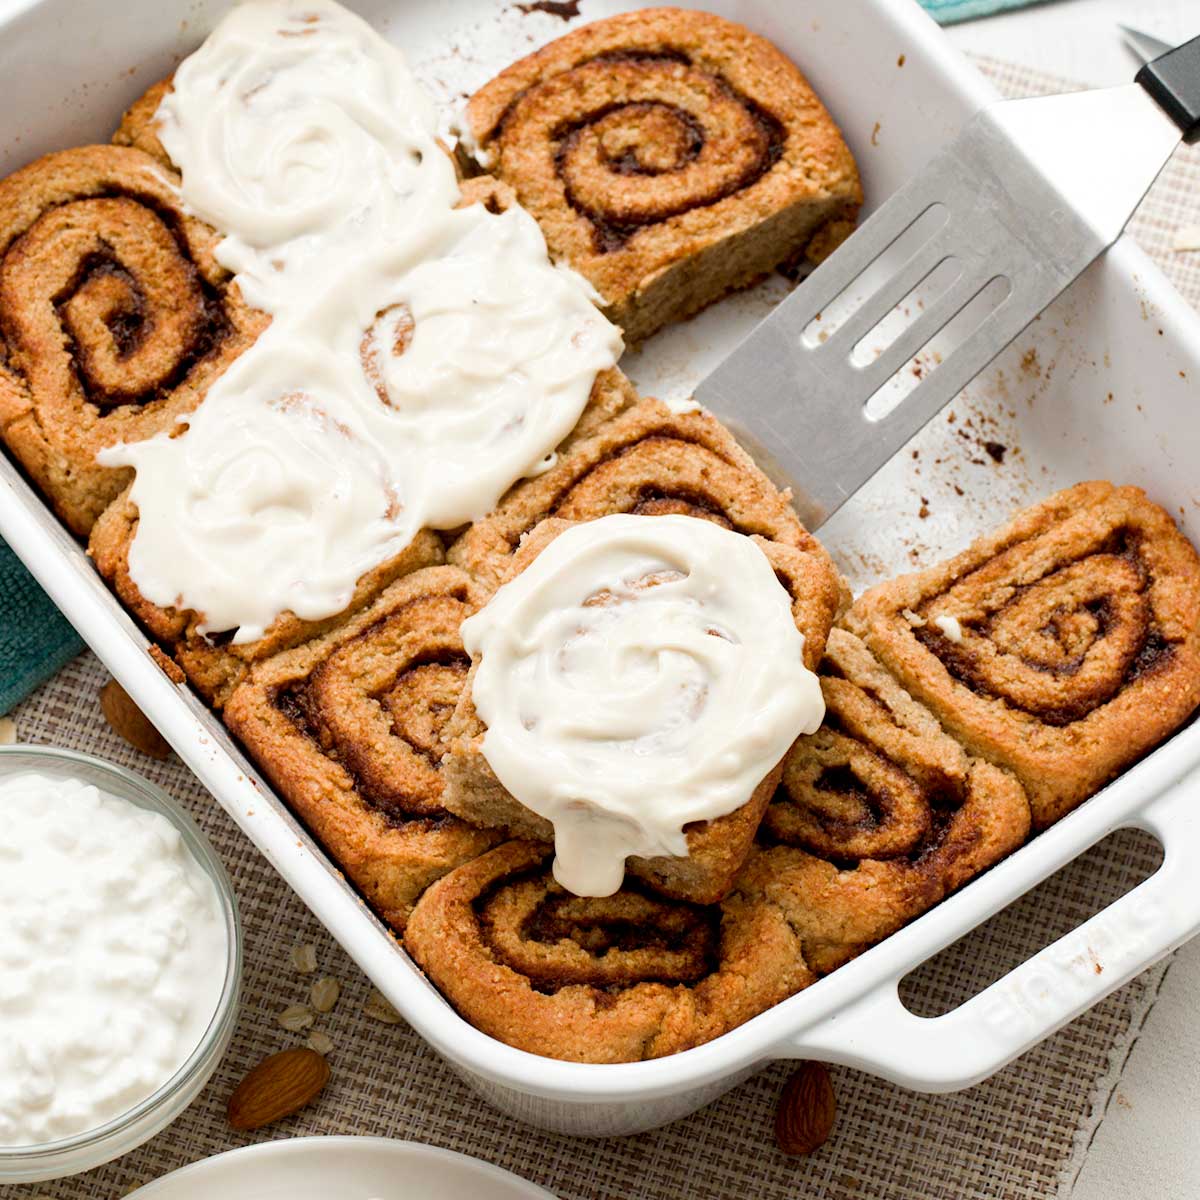
Pumpkin Cottage Cheese Scones (Chocolate Chunk)
|
Moist pumpkin cottage cheese scones with chocolate chunks made with oat flour and gluten-free flour. Naturally sweetened with maple syrup, these tender breakfast treats are easier on digestion and perfect for fall mornings or holiday brunches.
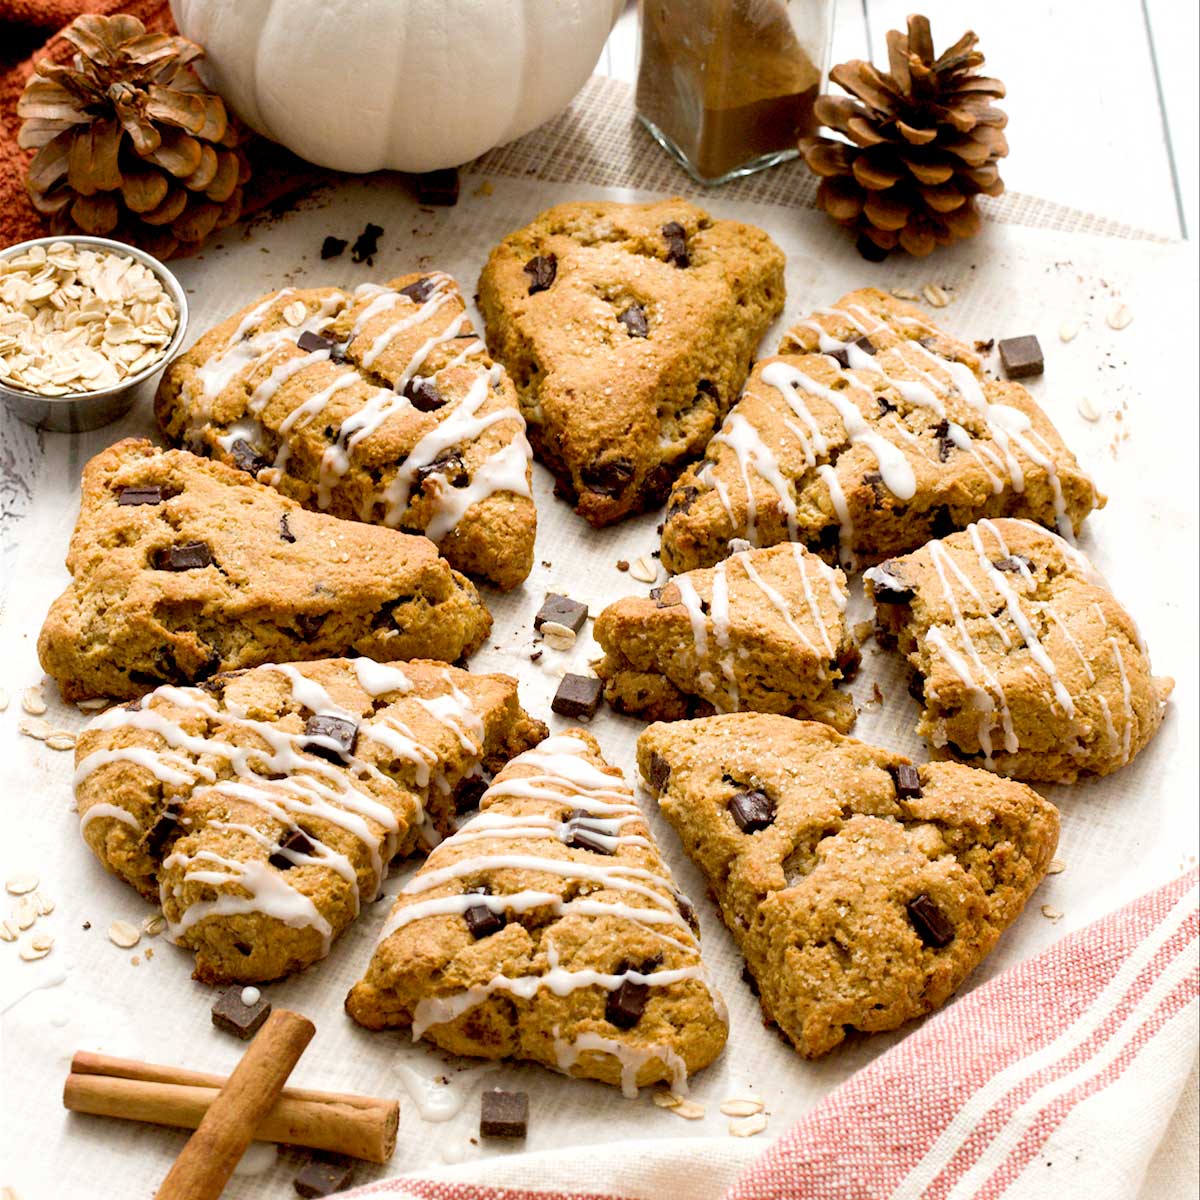
Scones can often be dry and bland, which is why I created these pumpkin cottage cheese scones with chocolate chunks that are moist and full of flavor! They’re gluten-free with a blend of oat and gluten-free flour for a fluffy texture, and the cottage cheese is blended smooth to give the scones a tender crumb plus a protein boost.
These breakfast scones are naturally sweetened with maple syrup and cane sugar, drizzled with a simple glaze, and totally loaded with dark chocolate chunks. The cinnamon and pumpkin pie spice give them all those cozy fall vibes we crave. I love how these are easier on my digestion because they’re gluten-free, use way less butter and sugar than traditional scone recipes, and feature clean, minimally processed ingredients.
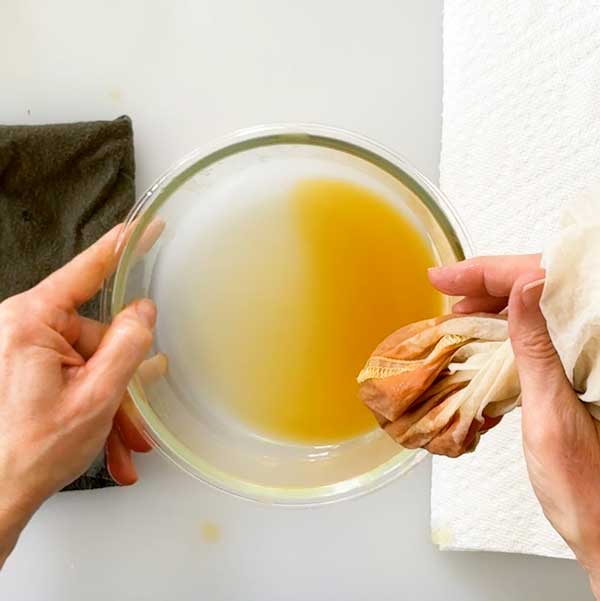
Adding pumpkin puree can make baked recipes soggy, which is why I share my super quick method of draining the excess moisture. It creates a thicker pumpkin paste that delivers amazing flavor without the sogginess.
You can batch prep them to grab and go on busy mornings, or make them as the show stopper at your special occasion or Thanksgiving gathering.
Why You’ll Love This Pumpkin Cottage Cheese Scones Recipe
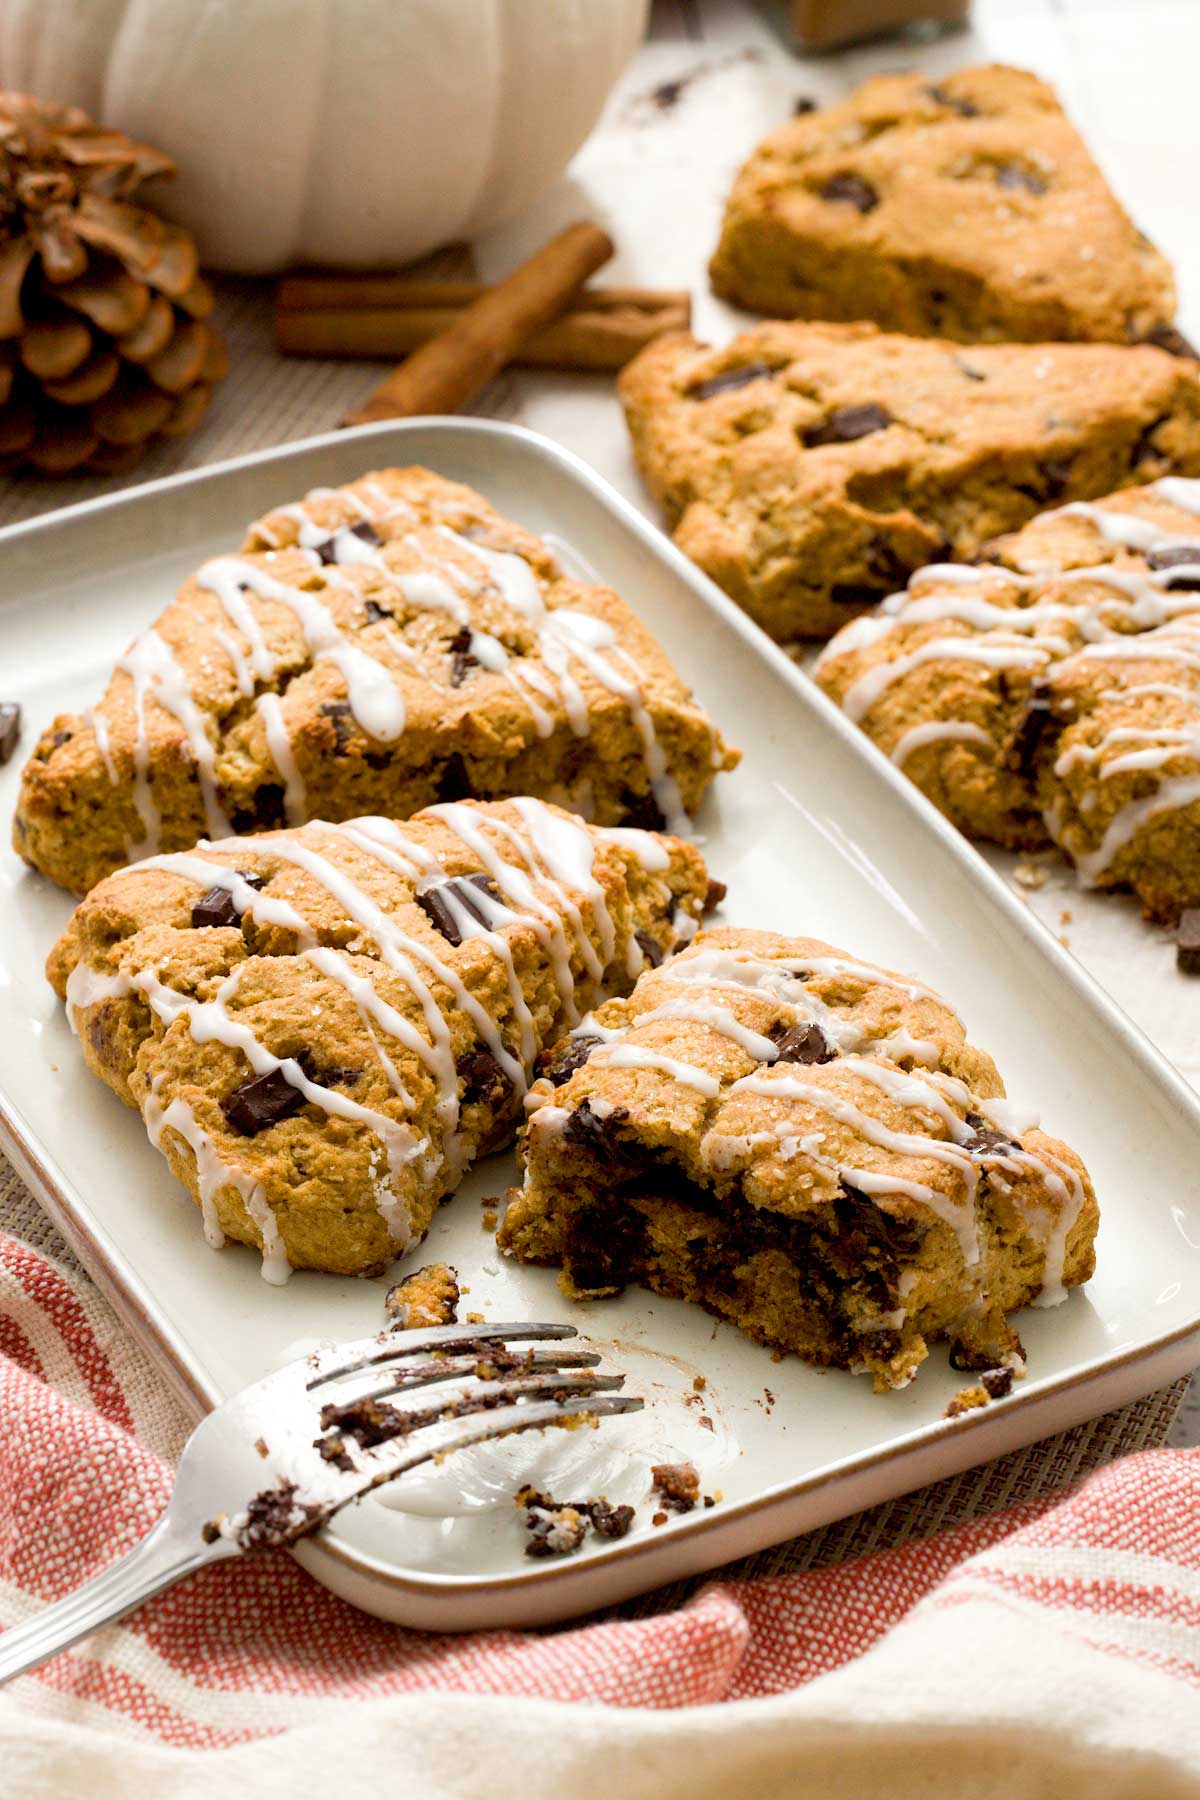
- Perfectly moist texture: Cottage cheese creates tender, never-dry scones that stay soft for days.
- Easier on digestion: Gluten-free with less butter and sugar than traditional recipes, using clean, minimally processed ingredients.
- Batch-friendly for busy mornings: Make ahead and freeze, or prep fresh for grab-and-go breakfasts.
- Cozy fall flavors: Pumpkin, cinnamon, and chocolate chunks create the perfect autumn treat for any special occasion.

Ingredients & Substitutions
Here is everything you need to make pumpkin cottage cheese scones:
Maple Syrup: Provides natural sweetness that complements the pumpkin flavor perfectly. You can swap with honey or agave syrup using the same amount.
Cane Sugar: Adds sweetness and helps create the tender crumb texture. You can substitute with any granulated sugar you like.
Cottage Cheese: The secret to moist, protein-packed scones that don’t need tons of butter. Use full-fat cottage cheese for the best texture, or try Greek yogurt as an alternative.
Pumpkin Puree: Make sure to use plain pumpkin puree, not pumpkin pie filling. The draining step is crucial. You could also use canned sweet potato puree as a substitute.
Vanilla Extract: Enhances all the flavors and adds warmth. Pure vanilla extract tastes best, but imitation vanilla works too.
Egg: Helps bind everything together and creates structure. You can use a flax egg (1 tablespoon ground flaxseed + 3 tablespoons water) for vegan option.
Oat Flour: Creates a tender, slightly nutty base that’s naturally gluten-free. Make your own by grinding rolled oats in a food processor or blender until fine.
Gluten-Free Flour: You can also use tapioca flour or starch. Avoid coconut or almond flour for this recipe. They make the scones too dense and they’ll taste more like a big cookie.
Here are some additional flour options you can in place of the oat and gluten-free flour listed in the recipe card.
| Additional Flour Options |
|---|
| 1-3/4 cups (280g) gluten-free flour |
| 1-3/4 cups (210g) all-purpose flour |
Baking Powder: Gives the scones their lift and fluffy texture. Make sure it’s fresh for best results.
Baking Soda: Works with the acidity in the cottage cheese to create extra tenderness.
Salt: Enhances all the flavors and balances the sweetness perfectly.
Butter: Use cold butter (straight from the fridge) for the flaky texture because the chunks create those perfect pockets. Vegan butter sticks work for dairy-free version.
Chocolate Chunks: Dark chocolate chunks are my favorite, but you can use mini chocolate chips, chopped chocolate bars, or even butterscotch chips.
Powdered Sugar: For the simple glaze that adds just the right amount of sweetness on top.
Milk: Just a touch to create the perfect glaze consistency. Any milk works – dairy or non-dairy.
Easily Adapt This Recipe for Any Diet
This recipe is naturally easy to tweak! Follow these simple swaps to make it gluten-free, dairy-free, or vegan while keeping the same great texture and flavor.
Gluten-Free: The recipe is naturally gluten-free when using certified gluten-free oats and a quality gluten-free flour blend.
Dairy-Free: Use dairy-free cottage cheese alternative (like Kite Hill) and vegan butter, plus non-dairy milk for the glaze.
Vegan: Replace the egg with a flax egg, use vegan cottage cheese alternative, vegan butter, and dairy-free chocolate chunks.
💡 Pro Tip: If you try a substitution, let us know how it worked in the comments!
How to Make My Pumpkin Cottage Cheese Scones Recipe
Here are easy, detailed, step-by-step instructions that are also repeated in the recipe card at the bottom of this blog post.
Step 1: Drain the Pumpkin
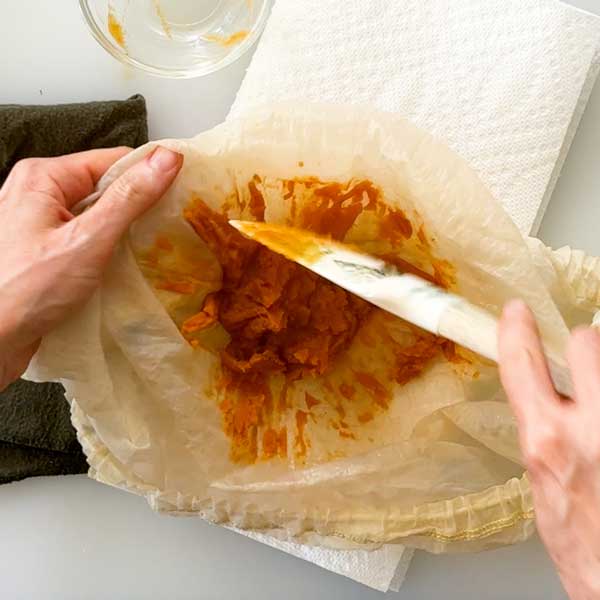
Preheat your oven to 400°F and line a baking sheet with parchment paper. To drain 1/2 cup pumpkin puree, place it in the center of paper towels, a clean kitchen towel, or a strainer bag. Close and gently squeeze to remove excess moisture, discarding the liquid. Scrape out the thickened pumpkin paste – you’ll have about 1/3 cup of concentrated pumpkin.

Step 2: Blend the Wet Ingredients
Add 3/4 cup cottage cheese, the drained pumpkin paste, 1/4 cup maple syrup, and 1/2 teaspoon vanilla extract to a blender, food processor, or chopper cup. Blend until you no longer see cottage cheese curds and the mixture is completely smooth. Add 1 egg and 1/4 cup cane sugar, mixing just until combined.

Step 3: Prepare the Dry Mixture
In a large mixing bowl, whisk together 1-1/2 cups oat flour, 2/3 cup gluten-free flour, 1-1/4 teaspoons baking powder, 1 teaspoon cinnamon, 1 teaspoon pumpkin pie spice, 1/4 teaspoon baking soda, and 1/2 teaspoon salt. Remove 1/2 cup butter from the refrigerator and dice into small pieces. Work the cold butter into the dry ingredients with your hands, squishing the flour into the butter chunks until you have a crumbly texture with visible butter pieces.


Step 4: Combine and Shape
Pour the cottage cheese mixture into the flour mixture and stir with a spatula just until combined – don’t overmix. Fold in 1/2 cup chocolate chunks. Sprinkle flour on your cutting board and turn the dough out onto it. Oil your hands lightly to prevent sticking and shape the dough into a circle about 1 inch thick. If the butter has softened, place the board in the freezer for 20 minutes to firm up.


Step 5: Glaze and Serve
Remove from oven and allow to cool slightly. In a small bowl, whisk together 1/4 cup powdered sugar and 1 teaspoon milk until smooth. Drizzle over the cooled scones and enjoy!


My Expert Recipe Tips
- Drain the pumpkin thoroughly: This step prevents soggy scones and intensifies the pumpkin flavor. The extra moisture will make your scones dense and flat.
- Keep butter cold: Cold butter creates the flaky, tender texture you want. If it starts to soften while mixing, pop the dough in the freezer for 20 minutes.
- Don’t overmix the dough: Stir just until ingredients come together. Overmixing develops gluten and creates tough scones.
- Look for chunky texture: You want visible butter pieces in the dough – these create the perfect flaky pockets when baked.
- Use the center oven rack: This ensures even browning on both tops and bottoms without burning.
Delicious Serving Suggestions
- Holiday brunch centerpiece: These make any fall or Thanksgiving table feel special. I like to arrange them on a pretty platter with fresh berries for color.
- Meal prep breakfast: Make a batch on Sunday and grab one throughout the week. They stay moist in an airtight container and taste amazing reheated for 10 seconds in the microwave.
Frequently Asked Questions
Do you love pumpkin? Check out more of my easy and nutritious sweet pumpkin recipes:
- Healthy Pumpkin Muffin Recipe with Oat Streusel
- Healthy Gluten-Free Pumpkin Roll with Almond Flour
- Easy Gluten-Free Maple Pumpkin Pie with Almond Flour
- Healthier Gluten Free Olive Garden Pumpkin Cheesecake
- Fluffy Pumpkin Protein Pancakes Recipe with Cottage Cheese
- BEST Pumpkin Cheesecake Cottage Cheese Ice Cream
And if you love scones, you’ll have to try making my Blueberry Lemon Gluten-Free Scones!


Pumpkin Cottage Cheese Scones (Chocolate Chunk)
Gluten-FreeIngredients
- 1/4 cup maple syrup
- 1/4 cup cane sugar
- 3/4 cup cottage cheese
- 1/3 cup pumpkin puree (strained, see notes)
- 1/2 teaspoon vanilla extract
- 1 egg
- 1-1/2 cups oat flour (180g)
- 2/3 cup gluten-free flour (120g)
- 1 teaspoon cinnamon
- 1 teaspoon pumpkin pie spice
- 1-1/4 teaspoons baking powder
- 1/4 teaspoon baking soda
- 1/2 teaspoon salt
- 1/2 cup butter
- 1/2 cup chocolate chunks
Glaze:
- 1/4 cup powdered sugar
- 1 teaspoon milk
Instructions
- Preheat your oven to 400°F and line a baking sheet with parchment paper. To drain 1/2 cup pumpkin puree, place it in the center of paper towels, a clean kitchen towel, or a strainer bag. Close and gently squeeze to remove excess moisture, discarding the liquid. Scrape out the thickened pumpkin paste – you'll have about 1/3 cup of concentrated pumpkin.
- Add 3/4 cup cottage cheese, the drained pumpkin paste, 1/4 cup maple syrup, and 1/2 teaspoon vanilla extract to a blender, food processor, or chopper cup. Blend until you no longer see cottage cheese curds and the mixture is completely smooth. Add 1 egg and 1/4 cup cane sugar, mixing just until combined.
- In a large mixing bowl, whisk together 1-1/2 cups oat flour, 2/3 cup gluten-free flour, 1-1/4 teaspoons baking powder, 1 teaspoon cinnamon, 1 teaspoon pumpkin pie spice, 1/4 teaspoon baking soda, and 1/2 teaspoon salt. Remove 1/2 cup butter from the refrigerator and dice into small pieces. Work the cold butter into the dry ingredients with your hands, squishing the flour into the butter chunks until you have a crumbly texture with visible butter pieces.
- Pour the cottage cheese mixture into the flour mixture and stir with a spatula just until combined – don't overmix. Fold in 1/2 cup chocolate chunks. Sprinkle flour on your cutting board and turn the dough out onto it. Oil your hands lightly to prevent sticking and shape the dough into a circle about 1 inch thick. If the butter has softened, place the board in the freezer for 20 minutes to firm up.
- Cut the dough into 8 wedges using a sharp knife or bench scraper. Place the wedges on your prepared baking sheet, spacing them apart. Optional: sprinkle with turbinado sugar for extra crunch and sparkle. Bake for 20-22 minutes or until lightly golden on top.
- Remove from oven and allow to cool slightly. In a small bowl, whisk together 1/4 cup powdered sugar and 1 teaspoon milk until smooth. Drizzle over the cooled scones and enjoy!
Video
Notes
Nutrition
Important Disclaimer
This recipe is created by a home cook and not a medical professional. Our ingredient philosophy is reviewed by RDNs, but this specific post is not personalized medical advice. Please consult your healthcare provider for dietary concerns.
Looking for more ways to cook and bake with cottage cheese?
Browse all of my cottage cheese recipes, including breakfasts, desserts, sauces, snacks, and savory meals.
Looking for more high-protein breakfast ideas?
Browse all of my high-protein breakfast recipes, including savory breakfasts, baked options, and make-ahead favorites.
Looking for more desserts made without refined sugar?
Browse all of my naturally sweetened dessert recipes, made with maple syrup, honey, fruit, and other simple sweeteners for treats that feel familiar and satisfying.

These were delicious!! This was my first time making scones and they turned out great. My whole house smelled amazing too! I will definitely be making these again soon. Thanks for sharing!
Hi Lindsay, I’m so excited you had a great experience making scones for the first time! And, that you loved them 🙂
I’m so excited for you to try these scones!! The flavor is incredible and there’s tons of chocolate 🙂